Monday, July 25, 2011

VBS Week: So Many Snacks!

This week was VBS at my church, and somehow my mom and I got talked into baking treats for all of the volunteers and parents. There were 90 volunteers. There was also a coffee shop where parents could stop by after dropping their kids off. So we were baking all week long. Here's a peek at what my kitchen looked like all week...

Oreo Pudding Cups

White Chocolate Popcorn

Cinnamon Scones

Cake Balls
Snickerdoodles

Chocolate Chip Pudding Cookies

Stay tuned later this week for some of the recipes!

Sunday, July 24, 2011

Cake Auction

Here's an update on my grandma's cake auction. I realized I showed off the flower cakepops, but not the finished product. So here it is...


And here are the cakes my aunt and cousin made for the auction...


The auction was pretty fun. They brought in a real auctioneer and there were about 40 cakes being auctioned off to raise money for a computer for the residents of the nursing home (where my grandma volunteers, she's far too young to live there yet!) I guess the auctioneer was pretty convincing and persistent in his efforts to get us to bid on cakes, because here are all of the cakes that we ended up with by the end of the auction...


Yep, there are 5 cakes. Yep, one of them is a Barbie cake. Yep, one of them is the one I made - my grandpa won that one (I don't think he knew it was the one I made!) Yep, we might have gone a little overboard, but at least it was for a good cause!

Saturday, July 16, 2011

Flower Cakepops


For my birthday this year, one of my sweet teacher friends (thanks, Meghan!) gave me cakepop wraps to make flowers. My grandma is having a cake auction at the nursing home where she volunteers this weekend (more on that later), so I thought this would be a fun time to make some flower cakepops.

They were really easy to make because they come all ready to go in a nice neat package.


 There are 3 different colors of flowers, and you use all three to make one flower.


Just fold up the edges of each flower...


Slide them up the cakepop one at a time... 


Then enjoy your beautiful garden of cakepops!


Monday, July 11, 2011

Fourth of July Decorations: Star-Spangled Banners


I've been seeing all of these super cute fabric banners all over blog-land and finally decided the perfect time to make one would be for the 4th of July party. I found all of this great patriotic fabric and then enlisted my mom's sewing help!


Once I got my mom on board, it was a pretty easy project. First we made a pattern for the triangles, then cut them out with pinking sheers (no hemming!)


When all of the flags were cut out, using all of the different fabrics, we attached them to our red ribbon. We used paper clips for the first banner, because that's what we had (the pins were far away upstairs). When we actually sewed them on, we found out it was easier to not pin them on at all, but just place them on the ribbon as we went.


I didn't put the flags on in any certain order, but just randomly placed them. The banners turned out pretty great, and added lots of festive-ness to the backyard for our party!


Saturday, July 9, 2011

Fourth of July Decorations: Poofs!

Ok, this one's not about baking at all, but remember how I got all crazy about my mom's 4th of July party this year? Well, that includes decorations, so get ready for a few snapshots of our decorations...First up, RED, WHITE, and BLUE tissue paper poofs!


I discovered how to make thses poofs from someone's post on pinterest (my other new obsession). They are super cute, and actually pretty easy once you get the hang of it.

I went a little overboard and made enough to decorate inside and out. I was pretty happy with how it all turned out!


Thursday, July 7, 2011

Fourth of July Baking: Oreo Pudding Cups

My second 4th of July dessert is a super easy no-bake Oreo dessert. We call it "Roger's Dessert" because my aunt's friend (named Roger) introduced us to it.


Here's the simple recipe (then I'll tell you how I tweaked it to make the pudding cups)


For the pudding cups, cross out butter from your list of ingredients. All you need for the crust is:


Don't follow steps 1 and 2 in the recipe. Instead of crushing all of the oreos together in a bowl, follow these easy steps...

1. Place muffin papers in 2 1/2 muffin tins (about 30 cups). Then put 1 whole oreo in each muffin cup.


2. Get out your meat tenderizer (or other appropriate crushing tool) and mash each oreo into a few pieces. They don't have to be super small, just make sure it breaks apart.


When your crust is ready, gather up your ingredients to make the filling.


While I was making this dessert, I realized that I have been making it wrong all this time, because instead of layering the pudding mixture with the cool whip on top, I just mix it all in together. So in the recipe, in step 3, add the cool whip in too. It makes it easier, and tastes great!

The last step is super easy - just spoon some of the filling into each pudding cup. Sprinkle the top of each one with some leftover oreo crumbs. Arrange on a pretty plate, and enjoy!


Tuesday, July 5, 2011

Fourth of July Baking: Cake Pops

Happy 4th of July!


My mom has a party every year for the 4th of July. She invites everyone over for dessert and then we all walk to the fireworks together. Usually it's very casual - no decorations, maybe make some brownies or cookies. But this year, for some reason (I blame the blogs and all of the fabulous inspiration out there in blogland), I went a little overboard with the decorations, desserts, etc... and I have lots to share, so stay tuned for more 4th of July goodness.
First up...Red, White, and Blue CakePops!


To make the cake a little more festive and fun, I put some blue food coloring in the white cake batter and also in the vanilla frosting. It was a patriotic surprise to bite into a blue cakepop!


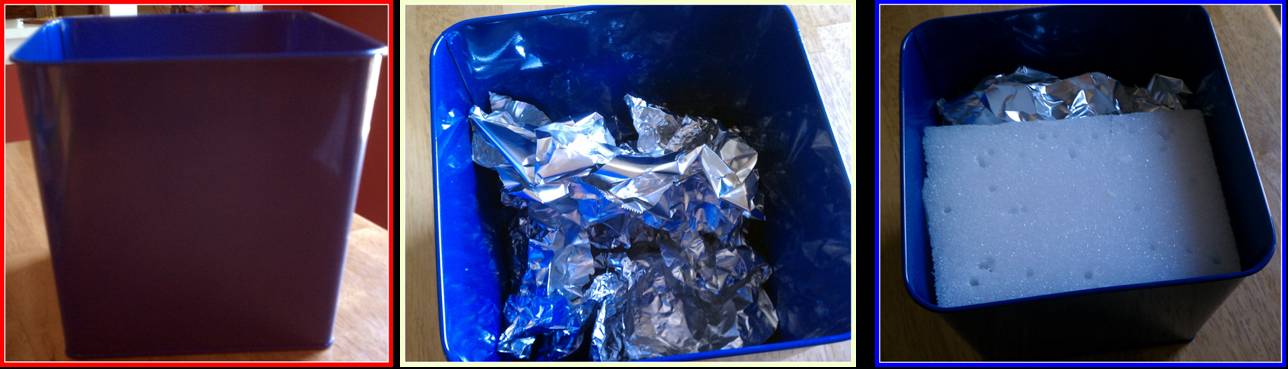
Then I arranged the pops in a metal bin I found in the dollar section at Target. I added a little bit of foil in the bottom for extra packing, then put in a block of styrofoam to stick the cake pops into.


The perfect centerpiece for the dessert table...  


...And the perfect little dessert!

P.S. Linking up with Muffin Mondays and Think Pink Sundays